WordPress Conversion Tracking with Gravity Forms and Google Analytics GA4
In 2023, Google forced everyone using Google Analytics to adopt their latest version, GA4. The configuration of conversion tracking in this new version is very different from the previous version, Universal Analytics or UA. After much trial and error, we have created a simple and repeatable process we use to connect our WordPress websites running Gravity Forms to GA4 for conversion tracking.
If you want the TLDR version, here it is. For more details, keep reading:
- Install the Google Site Kit plugin. You can find it here.
- Enable the Google Analytics add-on for Gravity Forms.
- Configure a Google Analytics feed in the Gravity Form you wish to track by adding a custom parameter name and value. We recommend using ‘contact_form’ as the parameter and the “Form Title” variable as the value.
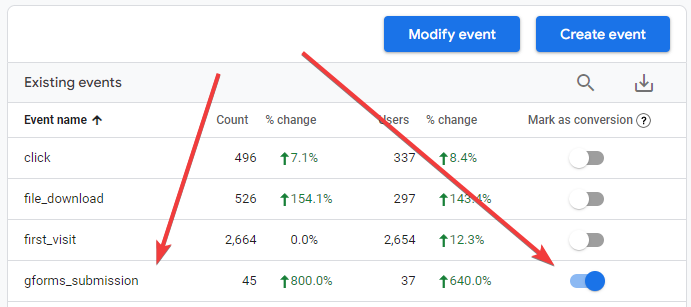
- Complete the form to trigger a conversion and verify this using the Real Time report in GA4. You’re looking for an event called “gforms_submission”.
- Mark that event as a conversion in the Admin section of GA4
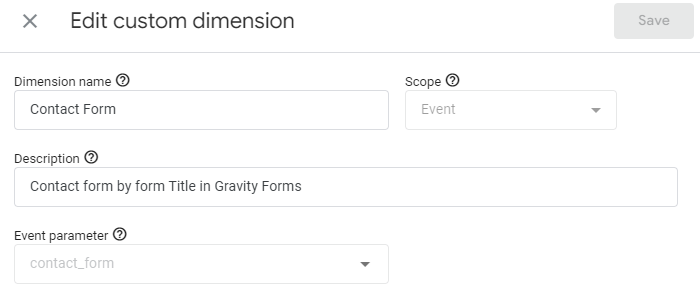
- Configure a custom dimension under Custom Definitions and call it ‘contact_form’ with a scope of ‘Event’
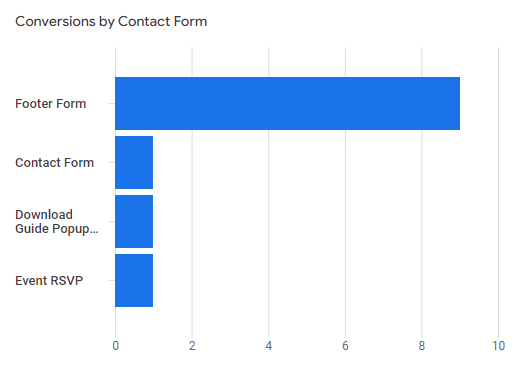
- Create a custom report in GA4 to view the conversions by form title.
- Profit
Google Site Kit
This plugin, made by Google, allows you to connect your website easily to Google Analytics GA4 and Google Search Console, among other products. If you have connected your site via some other method, such as manually installing the tracking code or with Google Tag Manager, you’ll need to remove those connections so you do not duplicate sessions.
Google Analytics Add-On for Gravity Forms
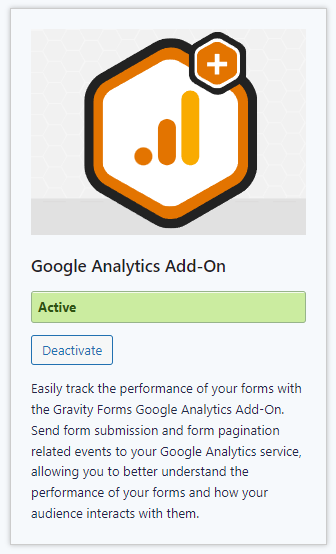
You can enable this feature directly from your website under ‘Forms -> Add-Ons -> Google Analytics Add-On.’ Next, you’ll need to configure a feed for the form you want to track. Edit the form you want to track and go to ‘Settings’, look for ‘Google Analytics’ and create a feed. Under ‘Event Parameters,’ create a parameter with a ‘Parameter Name’; we’ll use ‘contact_form’ for this tutorial. For the ‘Parameter Value,’ use the variable ‘Form Title.’ This allows the title of your Gravity Form to appear in your GA4 report.
Submit a Test Conversion
At this point, you’re ready to test. Be sure to log out of the website or use a different browser since Google Site Kit automatically prevents WordPress Admins from tracking session data in GA4. Submit your form and pull up the Realtime report in your GA4 account. Look for an event called ‘gforms_submission’; it may take 10 or 15 seconds to appear. Once you confirm the event has appeared, go to the Admin of your GA4 account found via the gear icon in the lower left corner. Go to ‘Events’ under the ‘Data display’ section and look for ‘gforms_submission’ on the list. Click the switch to make this a conversion.
Almost There!
Now, visit ‘Custom definitions’ under the ‘Data display’ section of the GA4 admin. Create a new custom dimension and set the Scope to ‘Event,’ add a Dimension name and description that makes sense to you, and look for ‘contact_form’ on the list under ‘Event parameter.’
Creating a Custom Report
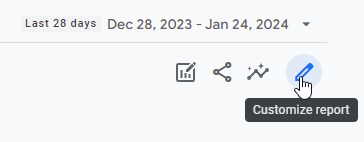
To recap, we have connected your website and Gravity Forms to GA4, and we’re passing the Form Title with each conversion; now we just need the ability to see this data in GA4. This requires a custom report (I know, right?). Start by browsing to ‘Reports -> Engagement -> Conversions’ in GA4. Click on the ‘Customize report’ pencil icon in the top right corner.
Look for ‘REPORT DATA’ at the top and click on ‘Dimensions.’ Click ‘Add dimension,’ look for the ‘Custom’ section, and click on ‘Contact Form,’ or whatever you called your custom dimension in the previous step. Now remove ‘Event name’ and click ‘Apply,’ and there you have it!
You may need to wait until the next day to see data in this report if you do all of this simultaneously. This change is not retroactive, meaning it will only apply new newly collected conversions that have occurred since setting all this up. Click ‘Save’ and Save as a new report. Give a name that will be easy for you and your team to find later.
Sharing is Caring
To get back to your report in GA4, look for the ‘Library’ button at the bottom. You should see the report you created there. From here, you can open this report for any GA4 account you have set up with this workflow, and other users with access to the GA4 account can find and use this report.
I hope this post helped you easily connect Gravity Forms to GA4. There are other ways to do this, but we found this method to be the easiest and most reliable. In our next post, we’ll cover how to track Gravity Forms submissions in Microsoft Ads.
Revolutionizing Senior Living Marketing with the Aline Gravity Forms Connector
Atlanta, GA – adPharos, a leader in digital marketing solutions tailored for the senior living industry, announces the release of a game-changing…
How to Prevent Domain Hijacking: Lessons from Sawnee’s Experience
Your domain is not just a part of your online identity; it’s your entire online identity. On May 3rd, 2024, Sawnee EMC…